The first time I made blackberry jam, I was trying to use up the last of a massive haul from a pick-your-own farm. My hands were stained purple, my kitchen looked like a crime scene, and I honestly had no idea what I was doing. I grabbed a box of pectin from the back of the pantry, crossed my fingers, and hoped for the best.
That first batch set. Barely. It was more like a thick syrup than a proper jam, but the flavor—oh, the flavor. It tasted like summer had been captured in a jar. I served it over thick slices of toast the next morning, and my husband asked, “Can you make this again? But, you know, make it jiggle?”
So I did. I went back to the drawing board, tested different pectin ratios, played with cooking times, and learned the hard way that blackberries need a little extra love to set properly. They’re not like strawberries or raspberries—they have a mind of their own. But once you figure out the rhythm, this homemade classic blackberry jam with pectin becomes the kind of thing you’ll want to make every single summer.
I’ve tweaked and tested this recipe over three seasons now, and I can tell you with confidence: this is the one. It’s not too sweet, it’s got that deep, jammy blackberry flavor, and it sets up perfectly every time. No runny jars, no sad breakfasts. Just real, honest jam that makes you feel like you actually know what you’re doing in the kitchen.
Why You’ll Love This Recipe
I’ve made a lot of jam over the years, and this version is the one I keep coming back to. It’s not complicated, but it delivers every single time. Here’s why I think you’ll love it too:
- Foolproof Setting: Using the right amount of powdered pectin means you get a perfect gel set every time—no guessing, no second-guessing.
- Just the Right Sweetness: This isn’t cloying or candy-sweet. The sugar balances the tartness of the blackberries without overwhelming their natural flavor.
- Small Batch Friendly: This recipe makes about 4-5 half-pint jars, which is perfect for gifting, enjoying, or stashing in the freezer without feeling overwhelmed.
- No Fancy Equipment Needed: You don’t need a water bath canner if you’re not planning to store it long-term. A large pot and some jars are all you really need.
- Deep, Rich Flavor: Blackberries have this incredible ability to taste both sweet and slightly tangy at the same time, and this jam highlights that beautifully.
What makes this recipe different from the dozens of others out there? It’s the little things—the way I crush half the berries and leave the other half whole for texture, the precise timing that keeps the pectin from breaking down, and the splash of lemon juice that brightens everything without making it sour. This is the jam I give as hostess gifts, the jam my kids fight over on their morning toast, and the jam that makes me look like I have my life together when I’m really just following a simple formula that works.
What Ingredients You Will Need
This homemade classic blackberry jam with pectin uses simple, straightforward ingredients. You might already have most of them in your kitchen. Here’s what you’ll need and why each one matters:
- Fresh or Frozen Blackberries (6 cups / about 1.5 pounds): Fresh is ideal when they’re in season, but frozen blackberries work beautifully too—just thaw them completely and don’t drain the juices. I prefer wild blackberries when I can find them; they’re smaller and more intensely flavored than the giant cultivated ones.
- Granulated Sugar (4 cups / 800 grams): Sugar isn’t just for sweetness—it’s essential for the jam to set properly. It interacts with the pectin to create that perfect gel structure. Don’t reduce the sugar unless you’re using a low-sugar pectin.
- Powdered Pectin (1 box, about 1.75 ounces / 49 grams): I use regular Sure-Jell or Ball brand pectin for this recipe. Make sure you’re not using the “low sugar” version unless you plan to adjust the sugar accordingly. Pectin is what gives jam its signature spreadable texture.
- Fresh Lemon Juice (2 tablespoons): The acidity in lemon juice helps the pectin activate and also brightens the flavor of the blackberries. It’s a small addition that makes a big difference.
- Unsalted Butter (½ teaspoon, optional): This is my secret trick. Adding a tiny pat of butter while the jam is cooking helps reduce foaming, which means you get a clearer, more beautiful final product. It doesn’t affect the flavor at all.
For the best results, I recommend using a good-quality pectin like Sure-Jell. I’ve tried store brands, and while they work, the consistency isn’t always as reliable. If you’re using frozen blackberries, look for ones that are individually frozen (not a solid block) so you can measure them accurately.
Substitution Note: If you want to use a low-sugar pectin, follow the instructions on that specific box—the sugar and pectin ratios will be different. You can also swap in honey or maple syrup, but you’ll need to use a pectin designed for liquid sweeteners.
Equipment Needed
You don’t need a professional kitchen to make great jam. Here’s what I use, along with some alternatives and tips I’ve picked up along the way:
- Large Heavy-Bottomed Pot (6-8 quart): A Dutch oven or stainless steel pot works best. The heavy bottom prevents scorching. Avoid thin aluminum pots—they create hot spots that can burn your jam.
- Wooden Spoon or Heatproof Silicone Spatula: Wooden spoons are classic for a reason—they don’t conduct heat and they’re gentle on your pot. Silicone spatulas work great too, just make sure they’re heat-safe up to at least 400°F.
- Half-Pint Canning Jars with Lids (4-5 jars): I reuse old pasta sauce jars for fridge jam, but if you’re planning to water bath can, use proper Mason jars with new lids. Ball and Kerr are my go-to brands.
- Potato Masher or Fork: For crushing the blackberries to your desired consistency. I like leaving some chunks for texture, so I go easy on the mashing.
- Liquid Measuring Cup (4-cup size): For measuring the sugar accurately. Dry measuring cups work too, but liquid cups are easier to pour from.
- Small Bowl: To mix the pectin with a small amount of sugar before adding it to the pot. This prevents clumping.
- Timer or Phone: Timing is everything with pectin. Set a timer and don’t wander off.
I’ve made jam in a cheap nonstick pot before, and it worked okay, but the jam didn’t set as firmly. If you’re just starting out, a good stainless steel pot is worth the investment. And honestly? A potato masher is non-negotiable—a fork works but it’s way more work.
Preparation Method
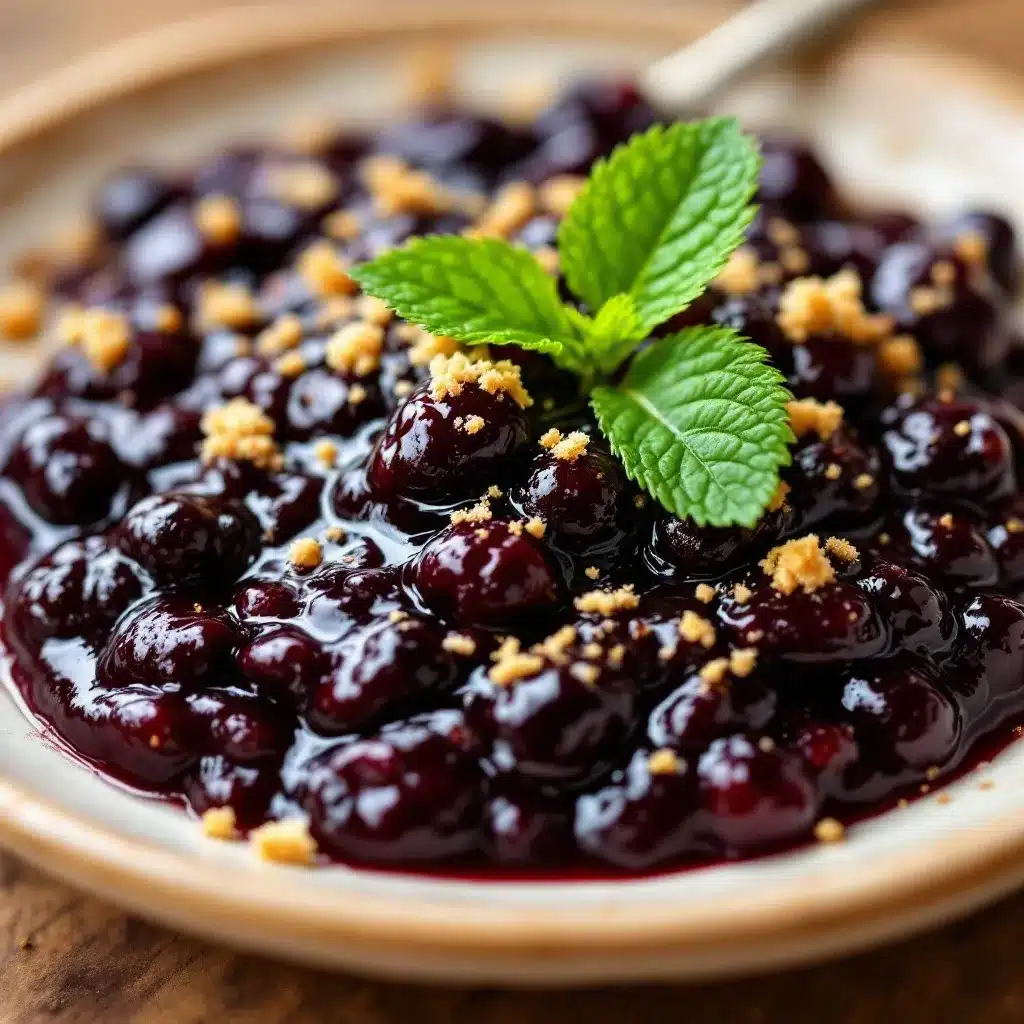
Making this homemade classic blackberry jam with pectin is straightforward, but there are a few moments where paying attention really pays off. Here’s exactly how I do it:
- Prepare Your Berries and Jars: Start by washing your blackberries gently in a colander. Pick out any stems or leaves that snuck in. If you’re using frozen berries, let them thaw completely in a colander set over a bowl—save that juice! Place your jars and lids in a pot of simmering water to sterilize them. Keep them hot until you’re ready to fill them.
- Crush the Blackberries: In your large pot, add the blackberries and crush them with a potato masher. I like to leave about half of them whole for a chunkier texture, but if you prefer a smooth jam, go ahead and crush them all. You should have about 4 cups of crushed berries and their juices.
- Mix the Pectin with Sugar: In a small bowl, whisk together ¼ cup of the measured sugar with the entire box of pectin powder. This step prevents the pectin from clumping when you add it to the fruit.
- Combine Berries and Pectin: Stir the pectin-sugar mixture into the crushed blackberries. Add the lemon juice and the optional butter. Turn the heat to medium-high and bring the mixture to a full, rolling boil—this means a boil that doesn’t stop when you stir it. Keep stirring constantly with your wooden spoon.
- Add the Remaining Sugar: Once the mixture is at a full rolling boil, pour in the remaining 3¾ cups of sugar all at once. Stir vigorously to dissolve the sugar completely. Keep stirring and bring it back to a full rolling boil.
- Boil for Exactly 1 Minute: Set your timer for 1 minute once the mixture reaches a boil that can’t be stirred down. Boil hard, stirring constantly. This is the critical moment—too short and your jam won’t set, too long and the pectin will break down.
- Test the Set: After 1 minute, remove the pot from the heat. To test if your jam is ready, place a small plate in the freezer beforehand. Drop a spoonful of jam onto the cold plate and let it sit for 30 seconds. Run your finger through it—if it wrinkles and holds its shape, it’s ready. If it’s still runny, boil for another 30 seconds and test again.
- Skim the Foam: Use a spoon to skim off any foam that has formed on top of the jam. This gives you a clearer, prettier final product. Don’t throw the foam away—it’s delicious on ice cream or stirred into yogurt!
- Fill the Jars: Using a ladle or a heatproof measuring cup with a spout, carefully pour the hot jam into your sterilized jars, leaving about ¼ inch of headspace at the top. Wipe the rims clean with a damp paper towel, then screw on the lids.
- Process or Cool: If you’re water bath canning, process the jars in boiling water for 10 minutes. If you’re making fridge jam, simply let the jars cool to room temperature on the counter, then refrigerate. The jam will continue to set as it cools.
A quick note: don’t panic if your jam looks runny right after you pour it into the jars. It takes a good 12-24 hours in the fridge to fully set. I’ve learned this the hard way, pouring a perfectly good batch down the sink because I thought I’d messed it up. Patience is key here.
Cooking Tips & Techniques
Over the years, I’ve made just about every mistake you can make with jam. Here’s what I’ve learned so you don’t have to repeat my failures:
Don’t Double the Recipe: I know it’s tempting to make a giant batch, but pectin behaves differently in larger quantities. The boiling time changes, and you risk ending up with a jam that won’t set or, worse, burns. Stick to single batches and make two if you need more.
Use a Timer, Not Your Gut: I once tried to eyeball the 1-minute boil while chatting with a friend on the phone. Let’s just say that batch turned into blackberry syrup—delicious syrup, but definitely not jam. Set a timer and don’t walk away from the stove.
The Cold Plate Test Is Your Friend: This is the most reliable way to check if your jam is ready without guessing. Keep a couple of small plates in the freezer before you start cooking. Test early and often—it’s better to test too soon than too late.
Watch for Scorching: Blackberry jam has a tendency to scorch on the bottom if you’re not stirring constantly, especially once the sugar is added. Use a heavy-bottomed pot and keep that wooden spoon moving. If you smell something burning, you’ve waited too long.
Room Temperature Matters: If your kitchen is cold, your jam might set faster than expected. If it’s hot and humid, it might take longer. Trust the cold plate test over the clock every time.
Variations & Adaptations
One of the best things about this homemade classic blackberry jam with pectin is how easy it is to play with. Here are some of my favorite variations:
- Blackberry-Lemon Jam: Add the zest of 2 lemons along with the juice. The citrus oils add a bright, fragrant note that pairs beautifully with the berries. I made this last spring and it was gone in two weeks.
- Spiced Blackberry Jam: Add 1 teaspoon of cinnamon, ½ teaspoon of cardamom, and a pinch of cloves along with the pectin. This version is incredible on apple cider donut loaf cake or stirred into oatmeal on a cold morning.
- Low-Sugar Version: If you need to cut back on sugar, use a low-sugar pectin and follow the sugar amount specified on that package (usually about 1½-2 cups). The texture will be slightly softer, but the flavor will still be fantastic.
- Seedless Blackberry Jam: If you’re not a fan of the seeds, press the crushed berries through a fine-mesh sieve before cooking. You’ll lose a bit of volume, but you’ll get a silky-smooth jam that’s perfect for thumbprint cookies or as a filling for double chocolate zucchini muffins.
- Mixed Berry Jam: Swap 2 cups of the blackberries for raspberries or blueberries. The combination creates a more complex flavor profile that’s wonderful on morning toast or paired with confetti sheet pan pancakes.
My personal favorite variation is the spiced one. I made it last fall and ended up giving half the batch as holiday gifts—everyone asked for the recipe. It’s warm, cozy, and unexpected in the best way.
Serving & Storage Suggestions
This jam is incredibly versatile, and how you serve it can change the whole experience. Here’s what I’ve found works best:
Serving: This jam is best served chilled or at room temperature. Spread it generously on warm buttered toast, flaky biscuits, or fresh scones. It’s also incredible spooned over vanilla ice cream, swirled into yogurt, or used as a filling for thumbprint cookies. For a savory twist, try it alongside a cheese board with sharp cheddar or brie—the sweetness cuts through the richness beautifully.
Storage: If you’re making fridge jam (not water bath canned), store the jars in the refrigerator for up to 3 weeks. The jam will continue to thicken as it sits, so don’t worry if it seems a little loose on day one. For longer storage, you can freeze the jam in freezer-safe jars or containers for up to 6 months. Just leave a little headspace for expansion.
Water Bath Canning: If you process the jars in a boiling water bath for 10 minutes, the jam becomes shelf-stable for up to 18 months. Store the sealed jars in a cool, dark place like a pantry or basement. Once opened, refrigerate and use within 3 weeks.
Reheating: If your jam crystallizes or becomes too thick over time, simply warm it gently in the microwave or on the stovetop. Add a splash of water or lemon juice if needed to loosen it up. The flavor won’t be affected.
One thing I’ve noticed: this jam actually improves after a few days. The flavors meld together and the texture becomes even more luscious. So if you can resist digging in right away, your patience will be rewarded.
Nutritional Information & Benefits
While jam is definitely a treat, blackberries themselves are packed with goodness. Here’s a quick look at what you’re getting in each serving:
Per 1 tablespoon serving: Approximately 50 calories, 13g carbohydrates (12g sugar), 0g fat, 0g protein, 1g fiber. These values will vary slightly depending on the exact sugar content and berry variety.
Health Benefits: Blackberries are rich in vitamin C, vitamin K, and manganese. They’re also loaded with antioxidants called anthocyanins, which give them that deep purple color and have been linked to reduced inflammation and improved heart health. The fiber content is a nice bonus, too.
Dietary Considerations: This recipe is naturally gluten-free, dairy-free (if you skip the optional butter), and vegan. The only potential allergen is the pectin, which is typically derived from fruit—but check the label if you have sensitivities. If you’re watching your sugar intake, consider the low-sugar variation mentioned earlier.
My Take: I don’t pretend that jam is a health food, but I do believe that homemade versions are far superior to store-bought. You control the sugar, you know exactly what’s in it, and you get the satisfaction of making something from scratch. That counts for something.
Conclusion
This homemade classic blackberry jam with pectin is the kind of recipe that makes you feel like a real cook. It’s simple enough for a beginner, but the results are impressive enough to share with pride. Whether you spread it on a lazy Sunday morning toast or gift it to someone you love, this jam delivers every single time.
I love this recipe because it reminds me that the best things in life don’t have to be complicated. A few good ingredients, a little patience, and a willingness to learn from your mistakes—that’s all it takes. And honestly? The first time you see that perfect set, that glossy surface, that deep purple color, you’ll feel like you’ve accomplished something real.
So go ahead—grab some blackberries, clear your counter, and give it a try. I’d love to hear how it turns out for you. Drop a comment below and let me know if you tried any variations, or share a photo of your finished jars. Happy cooking, friends!
Frequently Asked Questions
Can I use frozen blackberries instead of fresh?
Absolutely. Just thaw them completely and don’t drain the juices. The extra liquid might require a slightly longer boiling time to evaporate, so keep an eye on it and use the cold plate test to check for doneness.
Why didn’t my jam set?
There are a few common culprits: not boiling the jam long enough, using too much or too little pectin, or reducing the sugar too much. Make sure you’re using the exact measurements listed and boiling for the full 1 minute at a rolling boil.
Can I reduce the sugar in this recipe?
You can, but you’ll need to use a low-sugar pectin designed for that purpose. Regular pectin requires a specific amount of sugar to activate properly. If you want a less sweet jam, try the low-sugar variation I mentioned above.
How long does homemade jam last in the fridge?
Uncanned fridge jam will keep for about 3 weeks in the refrigerator. If you water bath can the jars, they’ll be shelf-stable for up to 18 months. Once opened, refrigerate and use within 3 weeks.
Can I make this jam without pectin?
Yes, but it’s a different process. Blackberries are naturally lower in pectin than some fruits, so you’d need to cook the jam longer to reduce it and achieve a set. The texture will be softer and more like a sauce. If you want a firmer, more traditional jam, I recommend using pectin.
Pin This Recipe!
Perfect Homemade Blackberry Jam Recipe
This foolproof blackberry jam recipe delivers a perfect gel set every time with deep, rich berry flavor. Made with simple ingredients and no fancy equipment needed, it’s the ideal small-batch jam for gifting or enjoying all summer long.
- Prep Time: 15 minutes
- Cook Time: 10 minutes
- Total Time: 25 minutes
- Yield: 4-5 half-pint jars 1x
- Category: Preserves
- Cuisine: American
Ingredients
- 6 cups fresh or frozen blackberries (about 1.5 pounds)
- 4 cups granulated sugar (800 grams)
- 1 box powdered pectin (about 1.75 ounces / 49 grams), such as Sure-Jell or Ball
- 2 tablespoons fresh lemon juice
- ½ teaspoon unsalted butter (optional, to reduce foaming)
Instructions
- Prepare your berries and jars: Wash blackberries gently in a colander, removing any stems or leaves. If using frozen berries, thaw completely in a colander set over a bowl and reserve the juice. Sterilize jars and lids in simmering water and keep hot until ready to fill.
- Crush the blackberries: In a large pot, add blackberries and crush with a potato masher, leaving about half whole for a chunkier texture. You should have about 4 cups of crushed berries and juices.
- Mix pectin with sugar: In a small bowl, whisk together ¼ cup of the measured sugar with the entire box of pectin powder to prevent clumping.
- Combine berries and pectin: Stir the pectin-sugar mixture into the crushed blackberries. Add lemon juice and optional butter. Turn heat to medium-high and bring to a full rolling boil (a boil that doesn’t stop when stirred), stirring constantly.
- Add remaining sugar: Once at a full rolling boil, pour in the remaining 3¾ cups of sugar all at once. Stir vigorously to dissolve completely and bring back to a full rolling boil.
- Boil for exactly 1 minute: Set a timer for 1 minute once the mixture reaches a boil that can’t be stirred down. Boil hard, stirring constantly.
- Test the set: Remove pot from heat. Place a small plate in the freezer beforehand. Drop a spoonful of jam onto the cold plate and let sit for 30 seconds. Run your finger through it—if it wrinkles and holds its shape, it’s ready. If still runny, boil another 30 seconds and test again.
- Skim the foam: Use a spoon to skim off any foam from the top of the jam for a clearer final product. Reserve foam for other uses.
- Fill the jars: Ladle hot jam into sterilized jars, leaving ¼ inch headspace. Wipe rims clean, screw on lids.
- Process or cool: For water bath canning, process jars in boiling water for 10 minutes. For fridge jam, let jars cool to room temperature, then refrigerate. Jam will continue to set as it cools over 12-24 hours.
Notes
Don’t double the recipe as pectin behaves differently in larger quantities. Use a timer for the 1-minute boil—do not eyeball it. The cold plate test is the most reliable way to check doneness. If your kitchen is cold, jam may set faster; if hot and humid, it may take longer. Trust the cold plate test over the clock. Jam improves after a few days as flavors meld.
Nutrition
- Serving Size: 1 tablespoon
- Calories: 50
- Sugar: 12
- Carbohydrates: 13
- Fiber: 1
Keywords: blackberry jam, homemade jam, small batch jam, pectin jam, summer preserves, berry jam, easy jam recipe