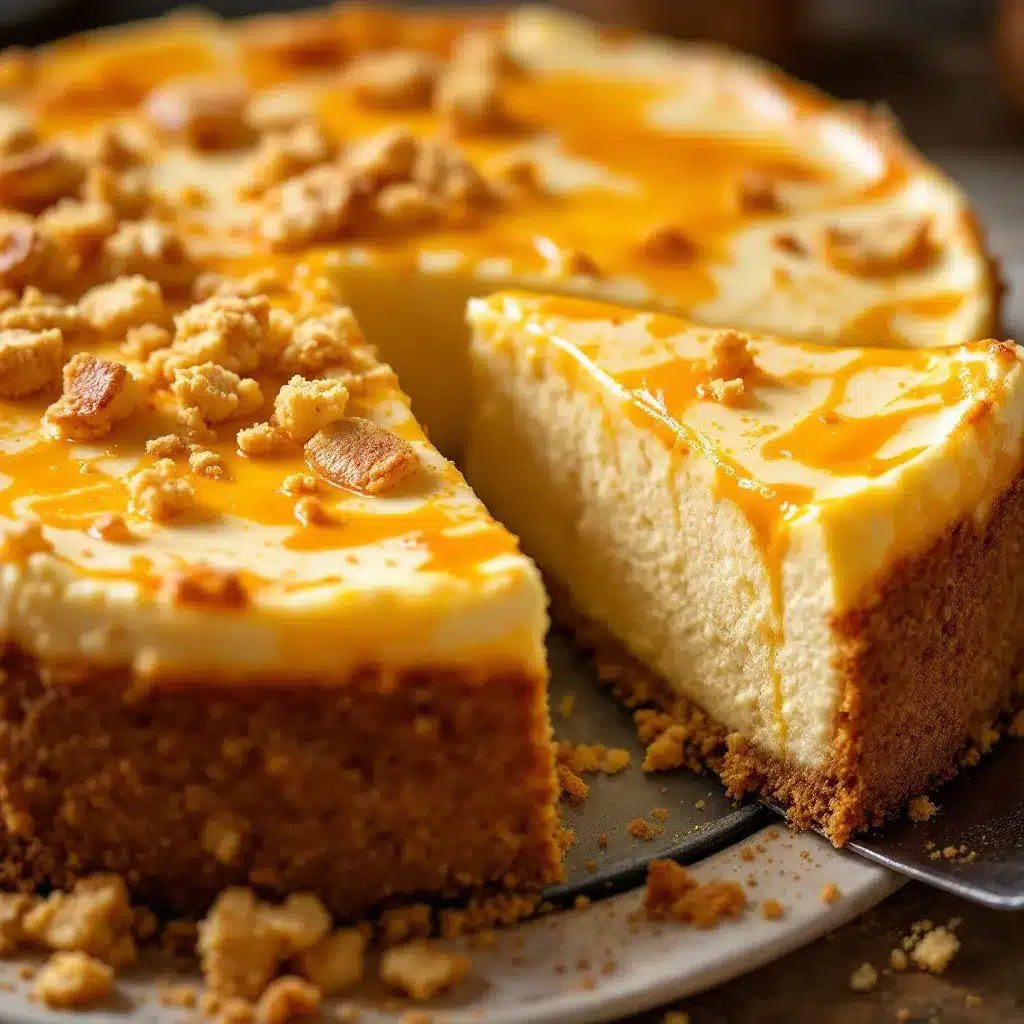
I pulled the ricotta cheesecake out of the oven and just stood there, staring at it. The top had cracked right down the middle, which honestly felt like a personal failure after all that careful water bath prep. But the smell—warm, creamy, with just a whisper of vanilla—filled the whole kitchen and made me not care quite so much.
This was attempt number four. The first three were either too dense, too sweet, or just plain ugly. But this one? Even with the crack, it looked like something you’d see in a bakery window. I let it cool on the counter while I cleaned up, and by the time I cut that first slice, the crack had practically disappeared into the creamy surface. The texture was unbelievable—light, almost fluffy, but still rich and satisfying in that way only real cheesecake can be.
I ended up bringing it to a friend’s dinner party that weekend, and people asked for the recipe before they even finished their first slice. Someone actually said it was the best cheesecake they’d ever had, and I’m not going to lie, I floated on that compliment for a good week. The secret, as it turns out, is the ricotta. It changes everything—the texture, the flavor, the way it sits on your tongue. Cream cheese gives you that tangy density we all know and love, but ricotta brings a lightness that makes you want another bite before you’ve even swallowed the first one.
Why You’ll Love This Recipe
I’ve tested this recipe more times than I care to admit, tweaking ratios and temperatures until everything clicked. Here is what makes this version different from all the others I tried:
- Incredibly Creamy Texture — The ricotta creates a silky, light crumb that feels almost like cheesecake mousse. It’s dense enough to feel indulgent but airy enough that you won’t feel weighed down after a slice.
- Not Too Sweet — This cheesecake lets the dairy shine. The sweetness is there, but it’s balanced, which means it pairs beautifully with fresh fruit, a drizzle of honey, or just a cup of black coffee.
- Simple Ingredients — You probably have most of this in your fridge and pantry right now. No weird extracts or hard-to-find specialty items.
- Make-Ahead Friendly — Cheesecake actually gets better after a day in the fridge. The flavors meld, the texture firms up perfectly, and you get to cross dessert off your to-do list a full day before your dinner party.
- Always Impresses — People expect cheesecake to be complicated. When you show up with a homemade one that looks and tastes this good, they assume you spent hours in the kitchen. I won’t tell if you don’t.
What really makes this recipe stand out is the technique. Most ricotta cheesecakes end up too wet or grainy because the ricotta isn’t handled right. I learned the hard way—draining the ricotta overnight makes a world of difference. It removes excess moisture so the cheesecake sets up properly without being heavy. And blending the ricotta until it’s completely smooth before adding the other ingredients? That step alone turned my cheesecake from good to unforgettable.
This is the kind of dessert that makes people close their eyes after the first bite. It’s comfort food, sure, but it’s comfort food that feels special. And honestly, that’s exactly what a good cheesecake should be.
What Ingredients You Will Need
This recipe uses simple, everyday ingredients, but each one plays a specific role in creating that perfect texture and flavor. Here is what you will need and why each ingredient matters:
For the Crust
- 1 ½ cups graham cracker crumbs (about 12 full sheets, crushed finely) — You can use store-bought crumbs, but I find crushing your own gives a better texture. Pulse them in a food processor or seal them in a bag and go to town with a rolling pin.
- ¼ cup granulated sugar — Just enough to sweeten the crust without making it candy-like.
- 6 tablespoons unsalted butter, melted — This binds the crumbs together. Use melted butter, not softened, for the best consistency. I prefer salted butter in a pinch, just reduce the added salt elsewhere.
- Pinch of salt — Balances the sweetness and brings out the buttery flavor.
For the Cheesecake Filling
- 2 cups whole milk ricotta cheese (drained overnight) — This is non-negotiable. Full-fat ricotta gives the creamiest result, and draining it removes excess liquid that would make your cheesecake watery. I recommend Galbani or Calabro brands for consistent quality.
- 16 ounces cream cheese, softened — Full-fat block cream cheese, not the spreadable kind in a tub. Philadelphia is my go-to. Let it sit on the counter for at least an hour before you start.
- 1 cup granulated sugar — Adds sweetness and helps with structure. You can reduce this to ¾ cup if you prefer a less sweet cheesecake.
- 4 large eggs, room temperature — Cold eggs will seize the batter and create lumps. Leave them on the counter with the cream cheese.
- 1 tablespoon vanilla extract — Pure vanilla, not imitation. It makes a noticeable difference in depth of flavor.
- 2 tablespoons all-purpose flour — Helps stabilize the cheesecake and prevents cracking. You can substitute with cornstarch for a gluten-free version.
- 1 tablespoon lemon zest (optional but recommended) — Brightens the whole thing and cuts through the richness. I never skip this.
- Pinch of salt — Enhances all the other flavors.
For Topping (Optional)
- Fresh berries (strawberries, blueberries, raspberries) — A handful per slice adds color and freshness.
- Powdered sugar — For dusting right before serving.
- Honey or berry compote — A warm drizzle takes this over the top.
If you are looking for another dessert that uses simple pantry staples, you might enjoy this apple cider donut loaf cake. It has that same cozy, homemade feel with minimal fuss.
Equipment Needed
You do not need a professional bakery setup for this recipe, but a few key tools will make your life much easier:
- 9-inch springform pan — The removable sides are essential for getting the cheesecake out in one piece. I have a basic OXO brand one that has held up for years.
- Food processor or blender — For smoothing the ricotta. A blender works fine, but a food processor gives you more control. If you have neither, press the ricotta through a fine-mesh sieve with a spatula. It takes longer but works.
- Electric hand mixer or stand mixer — You can do this by hand with a whisk, but your arm will hate you. A hand mixer is perfectly fine.
- Large roasting pan — For the water bath. It needs to be big enough to hold your springform pan with room around the edges.
- Aluminum foil — Heavy-duty foil works best. You will wrap the outside of the springform pan to keep water out.
- Rubber spatula — For scraping down the bowl and folding ingredients gently.
- Fine-mesh strainer — For draining the ricotta if you do not have cheesecloth.
- Cheesecloth or paper towels — For lining the strainer during the draining process.
- Cooling rack — Lets air circulate around the pan while it cools.
If you do not have a springform pan, you can use a deep 9-inch cake pan lined with parchment paper. Just be prepared to carefully flip it out or serve it straight from the pan. A water bath is still recommended even with a cake pan.
Preparation Method
Step 1: Drain the Ricotta (Do This the Night Before)
Line a fine-mesh strainer with cheesecloth or a few layers of paper towels and set it over a bowl. Spoon the ricotta into the strainer, cover it with plastic wrap, and refrigerate for at least 8 hours or overnight. You will be shocked at how much liquid drains out—usually about ¼ cup. This step is the difference between a creamy cheesecake and a watery mess. Do not skip it.
Step 2: Preheat and Prep
Preheat your oven to 325°F (163°C). Place a large pot of water on the stove to boil—you will need it for the water bath later. Wrap the outside of your springform pan with two layers of heavy-duty aluminum foil, making sure it goes up the sides and there are no tears. This keeps water from seeping into your cheesecake.
Step 3: Make the Crust
In a medium bowl, combine the graham cracker crumbs, sugar, and salt. Pour in the melted butter and stir with a fork until every crumb is moistened. The mixture should look like wet sand and hold together when you squeeze it. Press the mixture firmly into the bottom of your prepared springform pan. Use the bottom of a measuring cup to really pack it down. Bake the crust for 10 minutes, then set it aside to cool while you make the filling. Leave the oven on.
Step 4: Blend the Ricotta
Transfer the drained ricotta to your food processor or blender. Blend for about 2 minutes, scraping down the sides halfway through, until the ricotta is completely smooth with no graininess. This step is crucial—lumpy ricotta means a lumpy cheesecake. Set the smooth ricotta aside.
Step 5: Make the Filling
In a large mixing bowl, beat the softened cream cheese with an electric mixer on medium speed until it is smooth and fluffy, about 2 minutes. Scrape down the sides and bottom of the bowl. Add the sugar and beat for another 2 minutes until light and creamy.
Add the smooth ricotta and beat on low until just combined. Do not overmix here—you do not want to incorporate too much air. Add the eggs one at a time, beating on low after each addition until just incorporated. Scrape the bowl after each egg.
Add the vanilla extract, flour, lemon zest (if using), and salt. Mix on low until everything comes together, about 30 seconds. Give the bowl one final scrape and gently fold the batter a few times with a spatula to make sure there are no streaks.
Step 6: Assemble and Bake
Pour the filling into the cooled crust and smooth the top with a spatula. Give the pan a gentle tap on the counter to release any air bubbles. Place the foil-wrapped springform pan into your large roasting pan. Carefully pour the boiling water into the roasting pan until it reaches about halfway up the sides of the springform pan. Be gentle—you do not want water splashing into the cheesecake.
Bake at 325°F (163°C) for 55 to 65 minutes. The edges should look set and slightly puffed, but the center should still jiggle like Jell-O when you gently shake the pan. A toothpick inserted near the center should come out with a few moist crumbs, not wet batter.
Step 7: Cool Slowly
Turn off the oven and crack the door open. Let the cheesecake sit in the warm oven for 1 hour. This gradual cooling helps prevent cracking. After an hour, remove the pan from the water bath and take off the foil. Place the cheesecake on a cooling rack and let it come to room temperature completely, about 2 more hours.
Step 8: Refrigerate Overnight
Once the cheesecake is at room temperature, cover it loosely with plastic wrap and refrigerate for at least 6 hours, but overnight is best. This step is not optional—the cheesecake needs time to set and develop its flavor. Patience pays off here.
Cooking Tips & Techniques
I have made this cheesecake more times than I can count, and I have messed up just about every step at least once. Here is what I learned the hard way so you do not have to:
Room temperature ingredients matter more than you think. Cold cream cheese creates lumps that no amount of beating will fix. Cold eggs will seize the batter and leave you with a grainy texture. Set everything out on the counter at least an hour before you start. If you forget, place the eggs in a bowl of warm water for 10 minutes and microwave the cream cheese in 10-second bursts until it is soft but not melted.
Do not overmix the batter. I know it is tempting to keep beating until everything looks perfectly smooth, but overmixing incorporates too much air. Those air bubbles expand in the oven and then collapse, leaving you with cracks. Mix on low speed and stop as soon as the ingredients come together. Fold the last bits by hand with a spatula.
The water bath is your friend. I tried baking this cheesecake without a water bath once because I was in a hurry. The result was a dry, cracked, sad-looking dessert that tasted fine but looked terrible. The steam from the water bath creates a humid environment that keeps the cheesecake from drying out and cracking. Wrap the pan well, and do not skip this step.
Let it cool gradually. Sudden temperature changes cause cracks. That is why I let the cheesecake sit in the turned-off oven with the door cracked open. If you pull it straight from the oven to the counter, the temperature shock will split the top every time.
If you are looking for another dessert that benefits from careful technique, this moist chocolate zucchini cake is a great example of how simple ingredients can shine with the right method.
Variations & Adaptations
One of the best things about this ricotta cheesecake is how adaptable it is. Here are some variations I have tried and loved:
Lemon Ricotta Cheesecake
Increase the lemon zest to 2 tablespoons and add 2 tablespoons of fresh lemon juice. Reduce the vanilla to 1 teaspoon. The result is bright, tangy, and perfect for spring. Top with fresh blueberries for a classic combination.
Chocolate Swirl Ricotta Cheesecake
Melt 4 ounces of dark chocolate and let it cool slightly. After pouring the filling into the crust, drop spoonfuls of melted chocolate on top and swirl with a knife. The chocolate adds richness without overwhelming the delicate ricotta flavor.
Gluten-Free Version
Replace the graham cracker crust with a gluten-free cookie crust (use your favorite gluten-free shortbread or vanilla cookies). Substitute the 2 tablespoons of flour in the filling with cornstarch or arrowroot powder. Everything else stays the same.
Low-Sugar Version
Reduce the sugar to ¾ cup and use a sugar substitute like monk fruit sweetener in the crust. The texture will be slightly less firm, but the flavor is still fantastic. Top with fresh berries for natural sweetness.
Individual Mini Cheesecakes
Line a muffin tin with paper liners and press crust mixture into each cup. Fill with batter and bake for 18 to 22 minutes. These are perfect for parties and portion control. No water bath needed for mini versions—just place a small pan of water on the lower oven rack.
I personally love the lemon version. It reminds me of the cheesecake my grandmother used to make for Easter brunch, and it pairs beautifully with a cup of hot tea on a lazy Sunday afternoon.
Serving & Storage Suggestions
This cheesecake is best served cold, straight from the refrigerator. Let it sit at room temperature for about 10 minutes before slicing to take the chill off. Use a sharp knife dipped in hot water and wiped clean between cuts for the cleanest slices.
For presentation, I like to top each slice with a handful of fresh berries and a light dusting of powdered sugar. A drizzle of warm honey or berry compote makes it feel extra special. If you are serving this for a holiday or dinner party, arrange the berries in a pattern on top of the whole cheesecake before bringing it to the table—it looks stunning with minimal effort.
This cheesecake pairs beautifully with espresso, black coffee, or a crisp dessert wine like Moscato d’Asti. For a non-alcoholic option, try it with sparkling water and a squeeze of lemon to cut through the richness.
Storage: Cover the cheesecake loosely with plastic wrap or store it in an airtight container in the refrigerator for up to 5 days. The flavor actually improves after a day or two as the ingredients meld together.
Freezing: This cheesecake freezes beautifully. Wrap individual slices tightly in plastic wrap, then in aluminum foil, and freeze for up to 3 months. Thaw overnight in the refrigerator before serving. I often make two cheesecakes at once and freeze one for later—it is a lifesaver when unexpected guests show up.
Reheating: I do not recommend reheating this cheesecake. It is meant to be served cold. If you want a warm dessert, try a different recipe. However, if you have leftovers that have been in the fridge too long and gone a bit dry, a quick 10-second zap in the microwave can revive the texture slightly.
Nutritional Information & Benefits
Here are the approximate nutritional values per slice (based on 12 slices):
- Calories: 380
- Protein: 10g
- Fat: 24g
- Carbohydrates: 32g
- Sugar: 22g
- Fiber: 0g
- Sodium: 280mg
This cheesecake is not exactly health food, but it does offer some nutritional benefits. Ricotta cheese is high in protein and calcium, which support bone health and muscle function. The eggs provide high-quality protein and essential vitamins like B12 and D. If you use the lemon zest, you get a small dose of vitamin C and antioxidants.
For those watching their intake, this cheesecake is naturally lower in carbs than many traditional cheesecakes thanks to the ricotta. The protein content also makes it more satisfying than a typical dessert, so you are less likely to go back for a third slice.
If you are looking for a lighter dessert option, these frozen yogurt bark bites are a great alternative when you want something sweet but not heavy.
Conclusion
This creamy classic ricotta cheesecake has become my go-to dessert for almost every occasion. It is elegant enough for holiday dinners, simple enough for a Tuesday night treat, and forgiving enough for beginner bakers who are nervous about making cheesecake for the first time. The texture is unlike anything you will get from a cream cheese-only recipe—lighter, silkier, and somehow more satisfying.
I love how this recipe lets the ingredients speak for themselves. There is nothing complicated here, no fancy techniques or hard-to-find components. Just good dairy, a little patience, and a recipe that has been tested and tweaked until it works every single time.
If you make this cheesecake, I would love to hear how it turns out. Leave a comment below and let me know if you tried any of the variations or came up with your own twist. Did you top it with berries? Drizzle it with honey? Serve it plain with just a fork and a smile? Whatever you do, I hope it brings you the same quiet joy it brings me every time I pull that pan out of the oven.
Happy baking, friends. You have got this.
Frequently Asked Questions
Can I use low-fat ricotta for this cheesecake?
You can, but I do not recommend it. Low-fat ricotta has more water content, which can make the cheesecake watery and less creamy. If you must use it, drain it for at least 12 hours and expect a slightly different texture.
Why did my cheesecake crack on top?
Cracks usually happen from overmixing, sudden temperature changes, or overbaking. Make sure you mix on low speed, let the cheesecake cool gradually in the turned-off oven, and do not bake it longer than necessary. A small crack is normal and can be covered with toppings.
Can I make this cheesecake without a water bath?
You can, but the texture will not be as creamy and the top is more likely to crack. If you skip the water bath, place a small pan of hot water on the lower oven rack to create steam. It helps, but it is not as effective as the traditional water bath.
How do I know when the cheesecake is done baking?
The edges should look set and slightly puffed while the center still jiggles like Jell-O when you gently shake the pan. A toothpick inserted near the center should come out with a few moist crumbs, not wet batter. The cheesecake will continue to set as it cools.
Can I freeze this ricotta cheesecake?
Yes, absolutely. Wrap individual slices tightly in plastic wrap and then aluminum foil. Freeze for up to 3 months. Thaw overnight in the refrigerator before serving. The texture remains excellent even after freezing.
Pin This Recipe!
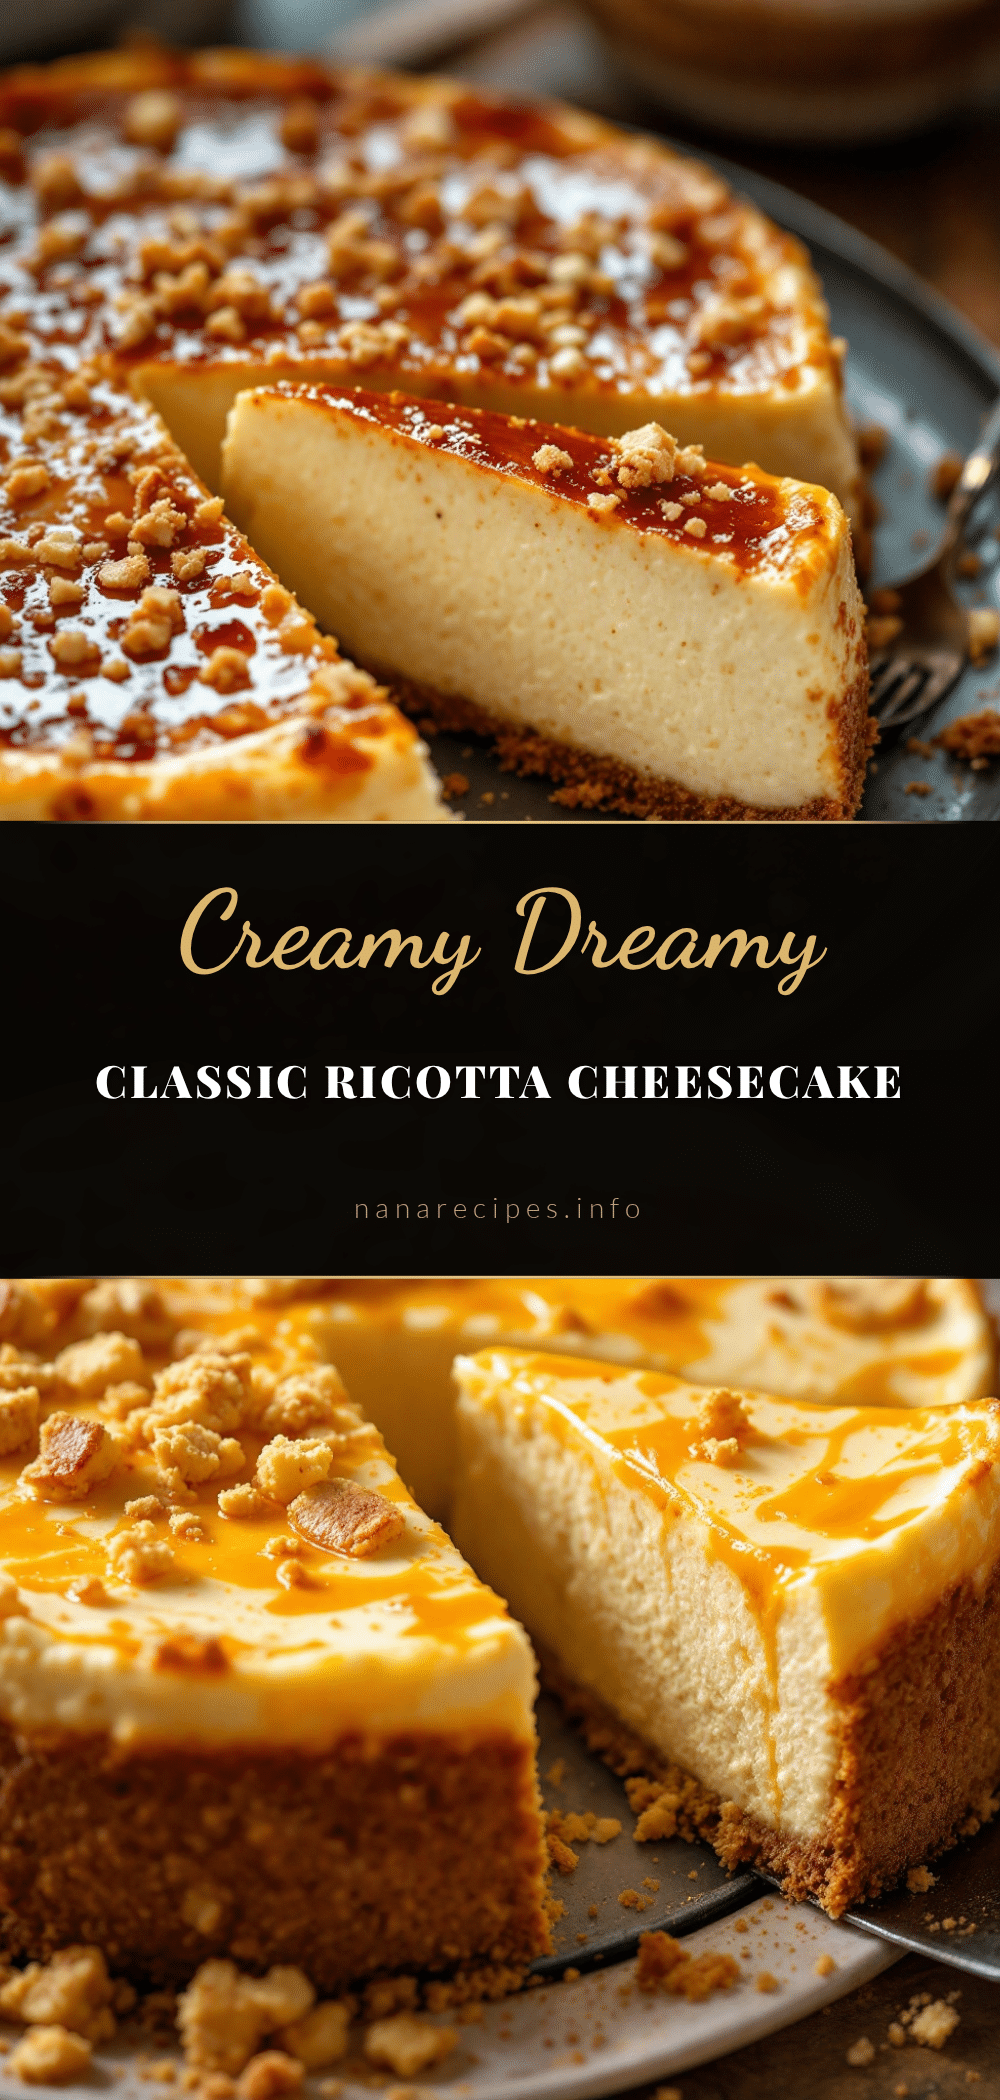
Creamy Classic Ricotta Cheesecake: Best Easy Homemade Recipe
This creamy ricotta cheesecake is light, silky, and rich, with a perfect balance of sweetness. The secret is draining the ricotta overnight for a flawless texture that will impress everyone.
- Prep Time: 30 minutes
- Cook Time: 55 to 65 minutes
- Total Time: 8 hours 30 minutes (includes draining and chilling)
- Yield: 12 servings 1x
- Category: Dessert
- Cuisine: Italian-American
Ingredients
- 1 ½ cups graham cracker crumbs (about 12 full sheets, crushed finely)
- ¼ cup granulated sugar
- 6 tablespoons unsalted butter, melted
- Pinch of salt
- 2 cups whole milk ricotta cheese (drained overnight)
- 16 ounces cream cheese, softened
- 1 cup granulated sugar
- 4 large eggs, room temperature
- 1 tablespoon vanilla extract
- 2 tablespoons all-purpose flour
- 1 tablespoon lemon zest (optional but recommended)
- Pinch of salt
- Fresh berries (strawberries, blueberries, raspberries) for topping (optional)
- Powdered sugar for dusting (optional)
- Honey or berry compote for drizzling (optional)
Instructions
- Drain the ricotta: Line a fine-mesh strainer with cheesecloth or paper towels, set over a bowl, spoon in ricotta, cover with plastic wrap, and refrigerate for at least 8 hours or overnight.
- Preheat oven to 325°F (163°C). Boil water for water bath. Wrap outside of 9-inch springform pan with two layers of heavy-duty aluminum foil.
- Make the crust: In a medium bowl, combine graham cracker crumbs, ¼ cup sugar, and a pinch of salt. Pour in melted butter and stir until moistened. Press firmly into bottom of prepared pan. Bake for 10 minutes, then cool. Leave oven on.
- Blend drained ricotta in a food processor or blender for about 2 minutes until completely smooth. Set aside.
- Make the filling: In a large bowl, beat softened cream cheese with electric mixer on medium until smooth and fluffy (2 minutes). Add 1 cup sugar and beat for another 2 minutes. Add smooth ricotta and beat on low until just combined. Add eggs one at a time, beating on low after each. Add vanilla, flour, lemon zest (if using), and a pinch of salt. Mix on low until combined. Fold gently with a spatula.
- Pour filling into cooled crust, smooth top, and tap pan gently to release air bubbles. Place foil-wrapped pan in a large roasting pan. Carefully pour boiling water into roasting pan until it reaches halfway up sides of springform pan.
- Bake at 325°F (163°C) for 55 to 65 minutes. Edges should be set, center should jiggle like Jell-O. A toothpick near center should come out with moist crumbs.
- Turn off oven, crack door open, and let cheesecake sit in warm oven for 1 hour. Remove from water bath, take off foil, and cool on a rack to room temperature (about 2 hours).
- Cover loosely with plastic wrap and refrigerate for at least 6 hours, preferably overnight.
Notes
Drain ricotta overnight for best texture. Use room temperature ingredients. Do not overmix batter. Water bath prevents cracking. Cool gradually in oven to avoid cracks. Refrigerate overnight for best flavor and texture.
Nutrition
- Serving Size: 1 slice
- Calories: 380
- Sugar: 22
- Sodium: 280
- Fat: 24
- Saturated Fat: 14
- Carbohydrates: 32
- Protein: 10
Keywords: ricotta cheesecake, creamy cheesecake, homemade cheesecake, easy cheesecake recipe, classic cheesecake, Italian cheesecake, best cheesecake