Introduction
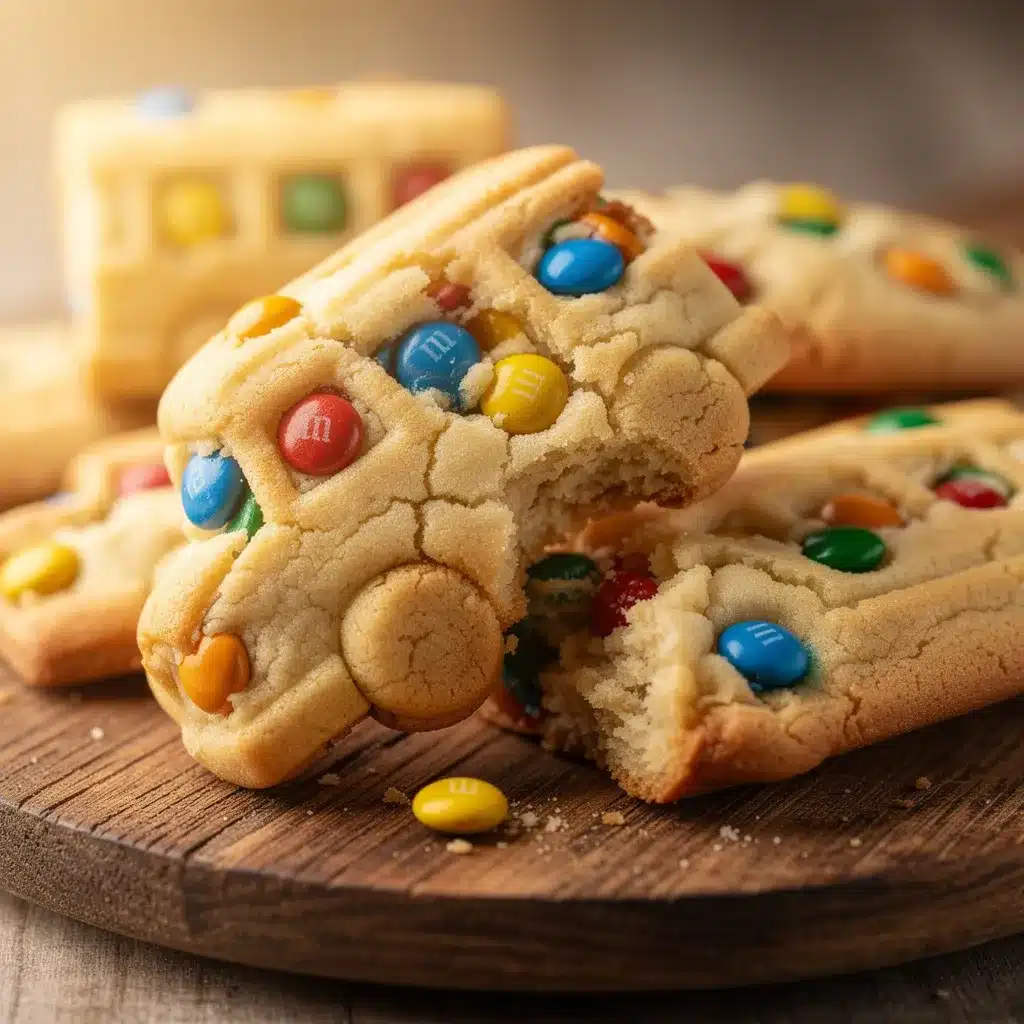
“Hey, did you see the cookies I brought for the school party?” my neighbor texted me one morning. I was running late, juggling breakfast and my laptop when the message popped up. Turns out, she had whipped up these adorable Tender Soft Baked M&M School Bus Sugar Cookies that looked like a snack straight out of a kid’s dream. I was skeptical at first—school bus-shaped cookies? With M&Ms on top? Would they really taste good or just be a cute gimmick?
Later that afternoon, after a whirlwind of prepping dinner and homework help, I found myself pulling out the recipe she shared. Honestly, I wasn’t expecting more than a quick sugar cookie with some candy on top. But as I pulled those warm, soft cookies from the oven, the smell filled the kitchen with a cozy, nostalgic sweetness that reminded me of simpler school days. The texture was just right—tender, not crumbly, with just enough chew. It quickly became clear why those cookies were the hit of the party.
Since then, I must have baked this recipe half a dozen times, tweaking it just a bit for softness or a little extra color. They’re not just for school parties anymore; these treats have become my go-to when I need a quick, kid-friendly snack that’s as fun to look at as it is to eat. What I love most? They’re foolproof. Even on my busiest days, these cookies come together easily, and the smiles they bring are totally worth the few minutes of effort.
Why You’ll Love This Recipe
- Quick & Easy: These cookies take under 30 minutes from start to finish, making them perfect when time is tight but you want something special.
- Simple Ingredients: No need for fancy or hard-to-find items—just pantry staples like butter, sugar, flour, and classic M&Ms.
- Perfect for Kids’ Events: Whether it’s a school party, after-school snack, or weekend treat, these school bus cookies bring joyful colors and smiles.
- Crowd-Pleaser: Both kids and adults love the soft texture combined with the burst of chocolate from the M&Ms.
- Unbelievably Delicious: The tender softness makes you want to close your eyes and savor each bite, while the crisp edges add a bit of delightful contrast.
- Unique Shape & Presentation: The school bus design isn’t just cute—it’s a creative twist that sets these cookies apart from your usual sugar cookie.
- Reliable Softness: The secret is a little extra egg yolk and careful baking time, which keeps these cookies soft day after day.
What Ingredients You Will Need
This recipe uses simple, wholesome ingredients to deliver that tender, soft texture and classic sugar cookie flavor, all while letting the colorful M&Ms shine as the star topping. Most are kitchen staples, and you can tweak a few if needed.
- Unsalted butter, softened (about 1 cup / 227 grams) – I prefer using Land O’Lakes for a rich flavor.
- Granulated sugar, 1 cup (200 grams) – adds sweetness and helps with that slight crisp on the edges.
- Large eggs, 1 whole plus 1 egg yolk (room temperature) – the extra yolk is key for softness.
- Pure vanilla extract, 2 teaspoons – quality matters here; I usually reach for McCormick.
- All-purpose flour, 2 ¾ cups (345 grams) – sifted for best texture.
- Baking powder, 1 teaspoon – gives a gentle lift without puffiness.
- Salt, ¼ teaspoon – balances the sweetness.
- M&Ms, about 1 ½ cups (270 grams) – classic colorful candies; you can swap for mini chocolate chips or seasonal-themed candies if you want.
Substitution tips: For a gluten-free option, try a 1:1 gluten-free baking flour blend. You can replace the butter with a dairy-free margarine, but the texture might be a touch different.
Equipment Needed
- Mixing bowls – at least two; one for wet and one for dry ingredients.
- Electric hand mixer or stand mixer – makes creaming butter and sugar effortless. If you don’t have one, a sturdy whisk and some elbow grease will work, but expect to spend a few extra minutes.
- Baking sheet – a standard 9×13 inch or similar size, lined with parchment paper or a silicone baking mat for easy cleanup.
- Measuring cups and spoons – accurate measurements are key for soft cookies.
- School bus cookie cutter – a must-have for the fun shapes; can be found online or in baking stores. If unavailable, a simple rectangle cutter can work in a pinch.
- Cooling rack – to let the cookies cool evenly without becoming soggy on the bottom.
Over time, I’ve found that silicone mats hold heat evenly and prevent sticking better than parchment, but both work well. And if you want to save space, a good multipurpose hand mixer is my favorite budget-friendly tool that handles most baking tasks.
Preparation Method
- Preheat your oven to 350°F (175°C) and line your baking sheet with parchment or a silicone mat. This ensures your cookies bake evenly and don’t stick.
- Cream the butter and sugar: In a large bowl, beat 1 cup softened unsalted butter with 1 cup granulated sugar using an electric mixer on medium speed for about 3-4 minutes. The mixture should become pale and fluffy—this step is crucial for tender cookies.
- Add the eggs and vanilla: Beat in 1 whole egg and 1 egg yolk, plus 2 teaspoons pure vanilla extract until fully combined. The extra egg yolk locks in moisture, keeping the cookies soft.
- Whisk the dry ingredients: In a separate bowl, sift together 2 ¾ cups all-purpose flour, 1 teaspoon baking powder, and ¼ teaspoon salt. This helps prevent clumps and ensures even distribution.
- Combine wet and dry: Gradually add the dry ingredients to the wet mixture, mixing on low speed until just combined. Avoid overmixing here, or the cookies might turn tough.
- Chill the dough: Cover the dough with plastic wrap and refrigerate for at least 30 minutes. This step helps the dough firm up, making it easier to roll and cut shapes without spreading too much.
- Roll out the dough: Lightly flour your work surface and roll the dough to about ¼ inch (6 mm) thickness. I find chilling the dough again if it gets too soft helps keep the shapes crisp.
- Cut the shapes: Use your school bus cookie cutter to stamp out shapes and transfer them carefully to the baking sheet, spacing about 1 inch apart.
- Add the M&Ms: Press the M&Ms gently into the tops of each cookie, arranging the colors for a fun, eye-catching look. Don’t press too hard or the candy may crack.
- Bake: Place the baking sheet in the oven and bake for 9-11 minutes. The edges should be just set and very lightly golden, but the centers will still look soft. This is the sweet spot for tender cookies.
- Cool: Remove from the oven and let the cookies sit on the baking sheet for 5 minutes before transferring to a cooling rack. This rest helps them firm up without drying out.
Pro tip: If the first batch spreads too much, chill the dough a bit longer or reduce oven temperature by 10 degrees. The cookies should hold their bus shape nicely.
Cooking Tips & Techniques
One trick I learned early on is that the temperature of your butter makes all the difference. Too warm and your cookies spread like crazy; too cold and the dough cracks when rolling. Soft but still cool butter is ideal.
Also, resist the urge to overbake. I’ll admit, I’ve pulled these out a little too late a time or two. The edges get crispy, but the center loses that tender chew. Set a timer and peek early.
When pressing M&Ms onto the cookies, do it gently. You want them nestled in, not smashed. This keeps the candy intact and your cookies looking picture-perfect.
Lastly, chilling the dough isn’t just for shaping—it helps develop flavor and texture. If you’re in a rush, a quick 30-minute chill works, but overnight in the fridge is even better for depth.
Multitasking tip: While the dough chills, I usually prep a quick iced tea or pack school lunches—it’s all about making the moments count without feeling rushed.
Variations & Adaptations
- Gluten-Free: Swap all-purpose flour with a 1:1 gluten-free blend. I’ve had good luck with Bob’s Red Mill gluten-free flour for soft, tender cookies.
- Vegan Version: Use dairy-free margarine or coconut oil in place of butter, flax egg (1 tablespoon ground flax + 3 tablespoons water) for eggs, and vegan-friendly candies or chocolate chips.
- Seasonal Colors: Change out the M&Ms for holiday-themed colors—red and green for Christmas, pastels for Easter, or orange and black for Halloween—to customize for any occasion.
- Flavor Twist: Add a teaspoon of almond extract along with the vanilla for a subtle nutty note that pairs beautifully with the sweet dough.
- Alternative Shapes: If you don’t have a school bus cutter, letters or simple rectangles decorated with M&Ms work great for birthdays or back-to-school celebrations.
One time, I tried swapping some of the sugar for brown sugar to get a deeper caramel flavor. It was delicious but changed the texture slightly, making the cookies a bit chewier than usual. So if you like tender-soft, stick to granulated sugar, but it’s fun to experiment!
Serving & Storage Suggestions
These cookies are best served at room temperature, just after cooling. The soft texture and colorful candy make them a perfect centerpiece for kids’ snack trays or after-school treats. Pairing them with a cold glass of milk or warm hot cocoa is a cozy classic combo.
Store leftovers in an airtight container at room temperature for up to 4 days. If you want to keep them longer, they freeze beautifully. Just pop them in a freezer-safe bag or container for up to 3 months. When ready to enjoy, let them thaw at room temp or warm gently in a 300°F (150°C) oven for 5 minutes to bring back that soft-baked feel.
Interestingly, the cookies actually taste better after a day or two once the flavors meld and the M&Ms soften slightly against the tender dough. So if you can wait, give them a day in the container before digging in.
Nutritional Information & Benefits
Each Tender Soft Baked M&M School Bus Sugar Cookie contains roughly 150-180 calories, depending on size and candy amount. They provide a quick energy boost thanks to simple carbs and sugars, which kids especially appreciate during busy afternoons.
Key ingredients like butter and eggs contribute protein and fat, helping balance the treat. The vanilla extract and M&Ms add flavor without artificial complexity. If you swap for gluten-free flour or dairy-free options, these cookies can accommodate various dietary needs.
While they’re not a health food, these cookies fit well into a balanced diet when enjoyed as an occasional snack. Plus, baking at home lets you control ingredient quality and avoid preservatives found in store-bought sweets.
Conclusion
These Tender Soft Baked M&M School Bus Sugar Cookies aren’t just a cute idea—they’re a reliable, delicious recipe that brings a little extra joy to snack time. Whether you’re packing lunches or hosting a school event, they hit the spot with their soft texture and colorful fun.
Feel free to tweak the shapes, colors, or even flavors (I’m partial to almond extract myself) to match your mood or occasion. For me, these cookies are a small, sweet way to celebrate everyday moments with a bit of whimsy and warmth.
Give them a try—you might just find yourself baking a batch in the middle of a hectic day like I often do. And if you do, I’d love to hear how they turned out for you!
Frequently Asked Questions
Can I make these cookies ahead of time?
Absolutely! You can prepare the dough up to 2 days in advance and keep it refrigerated. Just roll, cut, and bake when you’re ready.
What if I don’t have a school bus cookie cutter?
No worries! Rectangles, squares, or even circles work fine. You can also freehand the shape with a knife for a rustic look.
Can I use mini M&Ms instead of regular size?
Yes, mini M&Ms work great and give more candy distribution per cookie, which kids often love.
How do I keep the cookies soft longer?
Store them airtight at room temperature with a slice of bread inside the container; it helps keep moisture in and the cookies soft.
Is it okay to freeze the dough?
Definitely! Wrap the dough tightly in plastic wrap and freeze for up to 3 months. Thaw overnight in the fridge before rolling out.
For a fun twist on classic sugar cookies, these school bus treats pair nicely with crispy garlic chicken for a kid-friendly dinner or alongside a batch of fluffy pancakes for a sweet brunch spread. They’re truly versatile, just like your kitchen adventures.
Pin This Recipe!

Tender Soft Baked M&M School Bus Sugar Cookies

These tender, soft-baked sugar cookies shaped like school buses are topped with colorful M&Ms, making them a perfect fun and easy snack for kids’ events and everyday treats.
- Prep Time: 15 minutes
- Cook Time: 10 minutes
- Total Time: 25 minutes
- Yield: 24 cookies 1x
- Category: Snack
- Cuisine: American
Ingredients
- 1 cup (227 grams) unsalted butter, softened
- 1 cup (200 grams) granulated sugar
- 1 large egg plus 1 egg yolk, room temperature
- 2 teaspoons pure vanilla extract
- 2 ¾ cups (345 grams) all-purpose flour, sifted
- 1 teaspoon baking powder
- ¼ teaspoon salt
- 1 ½ cups (270 grams) M&Ms
Instructions
- Preheat your oven to 350°F (175°C) and line your baking sheet with parchment paper or a silicone mat.
- In a large bowl, beat 1 cup softened unsalted butter with 1 cup granulated sugar using an electric mixer on medium speed for about 3-4 minutes until pale and fluffy.
- Beat in 1 whole egg and 1 egg yolk, plus 2 teaspoons pure vanilla extract until fully combined.
- In a separate bowl, sift together 2 ¾ cups all-purpose flour, 1 teaspoon baking powder, and ¼ teaspoon salt.
- Gradually add the dry ingredients to the wet mixture, mixing on low speed until just combined. Avoid overmixing.
- Cover the dough with plastic wrap and refrigerate for at least 30 minutes.
- Lightly flour your work surface and roll the dough to about ¼ inch (6 mm) thickness. Chill again if dough becomes too soft.
- Use a school bus cookie cutter to cut out shapes and transfer them to the baking sheet, spacing about 1 inch apart.
- Press M&Ms gently into the tops of each cookie, arranging colors as desired.
- Bake for 9-11 minutes until edges are just set and lightly golden but centers remain soft.
- Let cookies sit on the baking sheet for 5 minutes before transferring to a cooling rack to cool completely.
Notes
Use soft but cool butter to prevent spreading. Chill dough well to keep shapes crisp. Press M&Ms gently to avoid cracking. Avoid overbaking to maintain soft centers. Dough can be prepared up to 2 days ahead and refrigerated or frozen for up to 3 months.
Nutrition
- Serving Size: 1 cookie
- Calories: 165
- Sugar: 14
- Sodium: 90
- Fat: 8
- Saturated Fat: 5
- Carbohydrates: 22
- Fiber: 0.5
- Protein: 2
Keywords: sugar cookies, M&M cookies, school bus cookies, kids snack, soft baked cookies, easy cookie recipe, colorful cookies